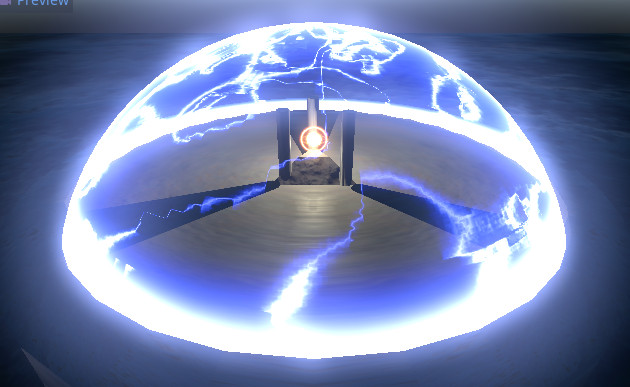
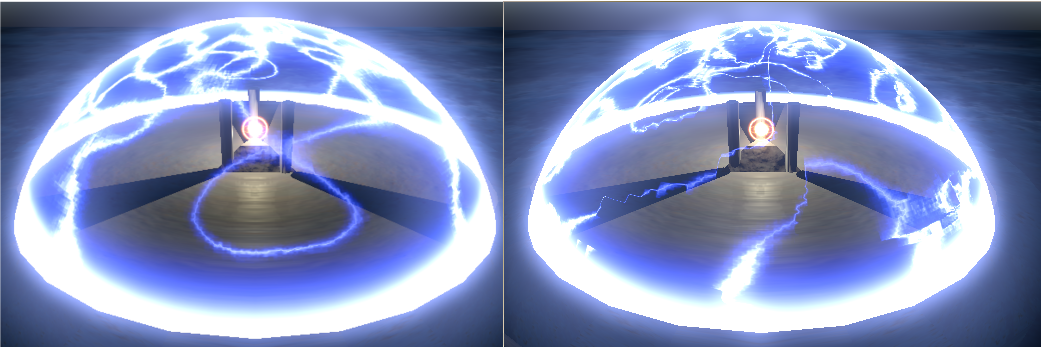
Last weekend I made a shader for a Godot shader/effects challenge. The theme was electricity, so I made an electric-shield effect. It's a pretty cool application of some noise combination techniques, so I thought I'd walk through how it works.
First up here's an image of the effect:
 And here it is as an animation:
And here is the source code.
And here it is as an animation:
And here is the source code.
Obviously there is some geometry to make there be a bit of a scene, but we can ignore that as it's pretty ordinary.
The Shield
The basics of this technique is to find the "edges" of some noise. If
you have a noise pattern, you can threshold it and you'll create some
islands which can be edge-detected:
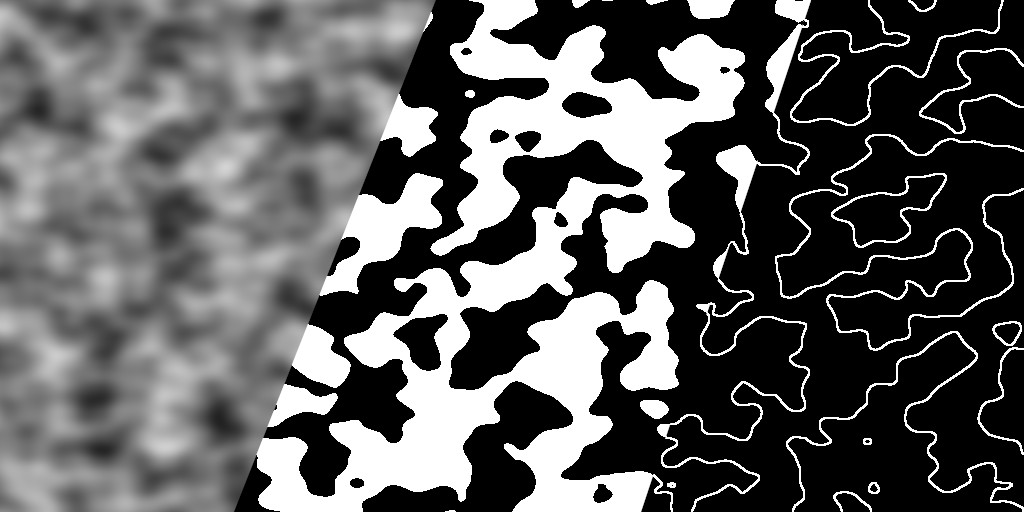 Rather than edge-detect using multisampling, you can edge-detect by using
a clever color ramp-type thing:
Rather than edge-detect using multisampling, you can edge-detect by using
a clever color ramp-type thing:
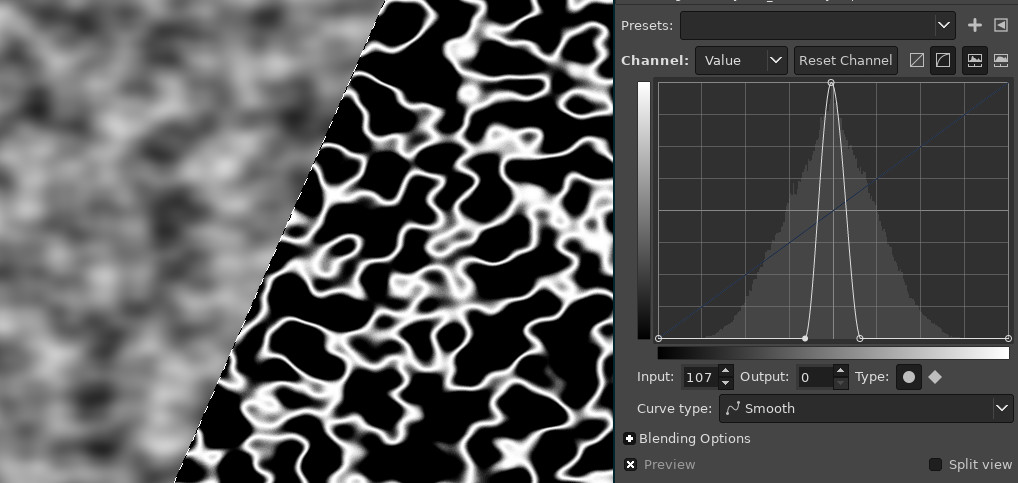 In GLSL, this sort of "edge detect" looks like:
float output = (0.5 - abs(input - 0.5));
You can scale and twiddle the inputs and outputs to adjust the width of
the "edge"
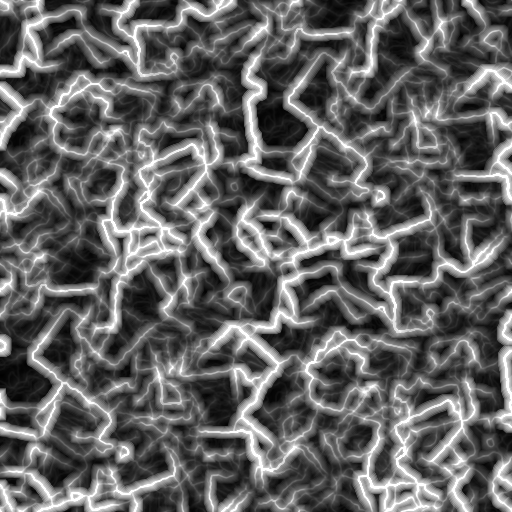
The next challenge is to animate it. If we were just to scroll the noise texture, you would see the shield visually "rotate" or maybe expand/shrink from a point. So instead you can use two scrolling noise textures that slide over each other:
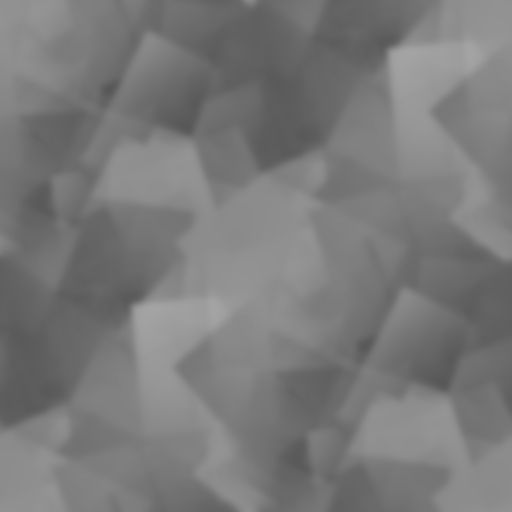
You'll notice that the edges of the noise are quite "curvy" while
electricity tends to create quite sharp and jagged shapes. To try add
some of these corners and to add a bit more interest to the motion of
the noise, I distort the input coordinates by another noise channel.
This noise channel is one made with gimp's "cubism" filter, so it looks
like:
Here's a before/after, but it also affects the animation by making the
lightning move faster in some places and slower in others - the "edges"
on the squares tend to "catch" the lightning:
That's the majority of the main shield effect, the rest is frensel edge-glow and using the depth-texture to highlight where it intersects the ground. I also modulate the color based on damage, and restrict where it is visible to allow the shield raise/lower effect
The Shield Impacts
The shield impacts are separate meshes, one created for each impact.
Rather than use procedural animated lightning, these ones use a static
lightning texture:
 This is created in gimp using an edge detect on the cubism/oilify filter.
It's very similar to the built in noise type "lava". I then used
erode/dilate to turn it into a signed distance field so that it would
"glow" nicely.
This is created in gimp using an edge detect on the cubism/oilify filter.
It's very similar to the built in noise type "lava". I then used
erode/dilate to turn it into a signed distance field so that it would
"glow" nicely.
This texture is mixed with a "pulse" based on the time. It's very similr
to the "edge detect" mentioned above, just based directly on the UV
rather than a noise texture:
float illumination = clamp(1.0 - abs(0.0 - UV.y + animate) * 10.0, 0.0, 1.0);
This is then combined with the lighting using a multiple/add that both
makes it solid where it is fully illuminated, but has tendrils coming off
it. I find this formula is great for making coloured glowing things:
float intensity = illumination * lightning + illumination
And that results in:
Coloring
Both of the talk-throughs above end with just floating point numbers
representing how "bright" the lighting should be at a certain point.
I add color using a function I developed called "neon":
vec3 neon(float val, vec3 color) {
	float ramp = clamp(val, 0.0, 1.0);
	vec3 outp = vec3(0.0);
	ramp = ramp * ramp;
	outp += pow(color, vec3(4.0)) * ramp;
	ramp = ramp * ramp;
	outp += color * ramp;
	ramp = ramp * ramp;
	outp += vec3(1.0) * ramp;
	return outp;
}
The aim of this code is to provide a white core, a bright inner-color,
and a longish "trail" of a darker color. I use this function whenever I
want to color a signed distance field to look like a glowing light.
You'll notice that the center may be a bright cyan, while the edges are
a deeper "blue". Or the center may be yellow but the edges are red. This
occurs because of the various "pow" functions applied to the color.